


Let's make a backend framework like Django (part 1)
How to code your very own backend framework


Introduction
Hey there! Are you tired of using pre-existing backend frameworks like Django, and want to create your own instead? Well, you're in luck! In this blog post, we'll be walking through the steps of creating your very own backend framework similar to Django. Whether you're a seasoned developer looking for a new challenge, or a beginner looking to learn more about backend development, this tutorial is for you! So grab a cup of coffee, and let's get started on building our own backend framework called celestis
So without further ado, let's begin!
Choosing a programming language
For this project, I chose Python due to its simple syntax and numerous libraries. But performing the same task wouldn't be extremely difficult in programming languages such as Javascript. But anyways, let's continue.
MVC
Model-view-controller (MVC) is a software design pattern that separates an application into three main components: the model, the view, and the controller. These components are designed to work together to create a web application:
Model: The model represents the data and logic of the application. It is responsible for storing and manipulating data, and for implementing the business logic of the application. For example, in an online shopping application, the model might include code to retrieve the product information from a database and to calculate the total cost of an order.
View: The view represents the user interface of the application. It is responsible for displaying data to the user and for collecting user input. In the online shopping example, the view might consist of HTML templates that display the product catalog and the shopping cart, and that allows the user to add items to their cart and place an order.
Controller: The controller mediates between the model and the view. It receives requests from the view, processes them, and returns a response to the view. In the online shopping example, the controller might handle requests to add items to the shopping cart, calculate the total cost of an order, and place an order. It would use the model to retrieve data and perform calculations, and it would use the view to render the response to the user.
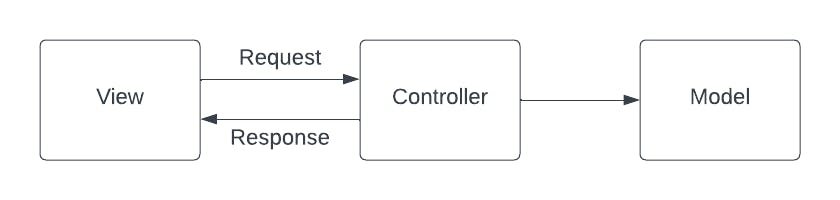
So, in the above diagram, we can apply our online shopping example. When a user tries to access the home page of the website, he sends a request from the view to the controller. Then, the controller finds the user's information from the model and sends a response to the user.
Create app function
Now that we have understood the basics of an MVC architecture, let's go ahead and start coding using python.
Firstly, the users must have the files necessary to use our backend framework. So, let's define a file called create_files.py that will create these files. These files include a views.py file (which will render the HTML templates) and a urls.py file (which will define the routes such as the home and about page).
import os
import json

# Create the necessary files for the user by using a project name
def create_app(name):
    # Create the main project folder whose name is the project name
    os.makedirs(name, exist_ok=True)

    # Create a file called views.py where the user can define his views
    views_path = os.path.join(app_folder, "views.py")
    with open(views_path, "w") as f:
        f.write("# views for the {} app".format(name))

    # Create a file called urls.py where the user can define the routes and the corresponding view
    urls_path = os.path.join(app_folder, "urls.py")
    with open(urls_path, "w") as f:
        f.write("# urls for the {} app".format(name))

    # Create a server.py file that the user will use to run the server
    server_path = os.path.join(app_folder, "server.py")
    with open(celestis_path, "w") as f:
        # Here we will place the server code. I will write this later
        f.write(some_code)

    # Create a file where the meta data about the project will be stored
    meta_path = os.path.join(app_folder, "meta.json")
    with open(meta_path, "w") as f:
        data = {"project": name}
        json.dump(data, f)
Custom command
We will be uploading our project to PyPI by the end of this blog. PyPI is a platform where you can publish pieces of software that can be used by anyone using python. To publish at PyPI, it is essential to create a file called setup.py. In this file, we will include metadata about our project.
Additionally, we will be defining our custom command through which users can create the files in their project directory through the create_app function.
To do this, we must first create a file called command.py:
import click
from create_files import *

# Bind the celestis function to a command that will be typed on terminal
@click.command()
@click.argument("subcommand", required=True)
def celestis(subcommand):
    # If the command is 'celestis create-files', then run the below code
    if subcommand == 'create-files':
        # Get the project name
        project_name = str(input("What is your project name?"))
        # Create files in the current directory where terminal has been opened
        create_app(project_name)
        # Log a success message to the terminal
        click.echo("Cool! Your project files have been created")
Now, let's create the setup.py file. In this file, we will bind the command 'celestis' to our function in command.py file.
from setuptools import setup, find_packages

setup(
    name='celestis',
    version='1.0',
    description='A simple backend framework built using python',
    author="Aryaan Hegde",
    author_email="aryhegde@gmail.com",
    entry_points={
        'console_scripts': [
            # When the user types 'celestis' on terminal, it runs the function celestis from the command.py file
            'celestis=command:celestis',
        ],
    },
)
Handling requests
Let's write a function that will handle a request when a user hits the server. I will create a new folder called controller where the request.py file will be stored. Again, this is due to the MVC architecture we discussed earlier. Here's the code for the requests.py file:
import os
import importlib.util
import re

def handle_request(project_path, route, method, form):
    # Get the HTML code for the route by using a get_view function
    response_body = get_view(route, project_path)

    # Return 404 Error if there is no response
    if not response_body:
        return "HTTP/1.1 404 Not Found\nContent-Type: text/plain\nContent-Length: 9\n\nNot Found"

    # Else, return the response in HTTP format with a code of 200 (success)
    # Embed the HTML code within this response
    return "HTTP/1.1 200 OK\nContent-Type: text/html\nContent-Length: {}\n\n{}".format(len(response_body), response_body)
The get_view function must do two things:
Find the corresponding function from the views.py file using the route it has been provided in the first parameter
Get the HTML template from the function and return this value
So let's write the code for get_view:
def extract_function(urls_page_content, route):
    # Find the urls array defined
    match = re.search(r"urls = (\[.+\])", urls_page_content)
    if not match:
        return False

    # Process the urls array
    urls = eval(match.group(1))

    # Find the correct route and return it
    for u in urls:
        if u[0] == url:
            return u[1]
    return False

def get_view(route, project_path):
    # Getting the urls.py file
    urls_path = os.path.join(project_path, "urls.py")

    # If the file does not exist, return False
    if not os.path.exists(urls_path):
        return False

    # Read the contents of the urls.py file
    with open(urls_path, "r") as f:
        contents = f.read()

    # Step 1: Get the function name from the urls.py that corresponds to the provided route
    function_name = extract_function(contents, route)

    # Find the views.py file
    views_path = os.path.join(project_path, "views.py")

    # Extract the file's content
    spec = importlib.util.spec_from_file_location("views", str(views_path))
    views_module = importlib.util.module_from_spec(spec)
    spec.loader.exec_module(views_module)

    # Get the function from the file
    view_func = getattr(views_module, function_name)

    # Return the template from the view
    return view_func()
The above code takes in two parameters: route and project path. It then finds the function in the views.py file by using the route and the urls.py file. The user must return an HTML template in the function in the views.py file. So, by doing view_func() in the above code, get_view returns the HTML template.
In the handle_request function, the HTML template retrieved from the get_view function will be embedded in an HTTP response.
Rendering templates
Currently, the user can send HTML code as a string in the views.py file. But, if he has an HTML file stored in the project directory, there is currently no way for him to return it. To solve this issue, we must create a function that renders an HTML template.
def render_template(file_path):
    # Open the HTML file that the user will provide and read its content
    with open(file_path) as f:
        template = f.read()

    # If the HTML file is empty, return an error message
    if os.path.exists(file_path) and not template:
        template = f"<p>The HTML file at {file_path} was empty</p>"

    # Else, return the HTML code inside the file
    return template
This render function is defined inside a file called render.py that is present inside a folder called view (as prescribed by the MVC architecture).
Server code
Now it's time to put everything together when we write our server code. Remember when we wrote the following code in our first block?
server_path = os.path.join(app_folder, "server.py")
with open(celestis_path, "w") as f:
    # Here we will place the server code. I will write this later
    f.write(some_code)
Now we will write the code and store it as a string for it to be accessed while writing the line f.write(server_code).
# Importing the necessary modules
import socket

# Importing the request file from the controller folder
from celestis.controller import request as rq
import os
import json

# Get the method (GET or POST), route and headers from any request
def parse_request(request):
    if request == "":
        return "GET", "/", ""
    lines = request.split("\n")
    method, path, headers = lines[0].split(" ")
    headers = dict(line.split(": ") for line in lines[1:-2])
    return method, path, headers

# If form data has been sent, parse it
def parse_form(headers):
    if "Content-Type" not in headers:
        return {}
    if headers["Content-Type"] != "application/x-www-form-urlencoded":
        return {}
    return dict(pair.split("=") for pair in headers["Content-Length"].split("&"))

# Creating a socket connection to port 8080
sock = socket.socket(socket.AF_INET, socket.SOCK_STREAM)
sock.bind(("localhost", 8080))
sock.listen(8080)

# Server running message
print("Celestis server is listening at port 8080...")

# Constantly check for a hit to the server
while True:
    conn, addr = sock.accept()
    request = conn.recv(1024).decode("utf-8")

    method, path, headers = parse_request(request)
    form = parse_form(headers)

    # Send a response that was retrieved from the handle_request function
    response = rq.handle_request(os.getcwd(), path, method, form)
    conn.sendall(response.encode("utf-8"))
    conn.close()
Now after modifying the setup.py file a bit, we are done with our task!
Example
Now let's test our library as an end user:
pip install celestis
cd path/to/project/file
celestis create-files

What is your project name?new_project
Cool! Your project files have been created
Now let's write the code in the urls.py file:
# Telling celestis that at the '/' route, run the home function in the views.py file

urls = [("/", "home")]
from celestis.view import render as rd

def home():
    return rd.render_template("home.html")
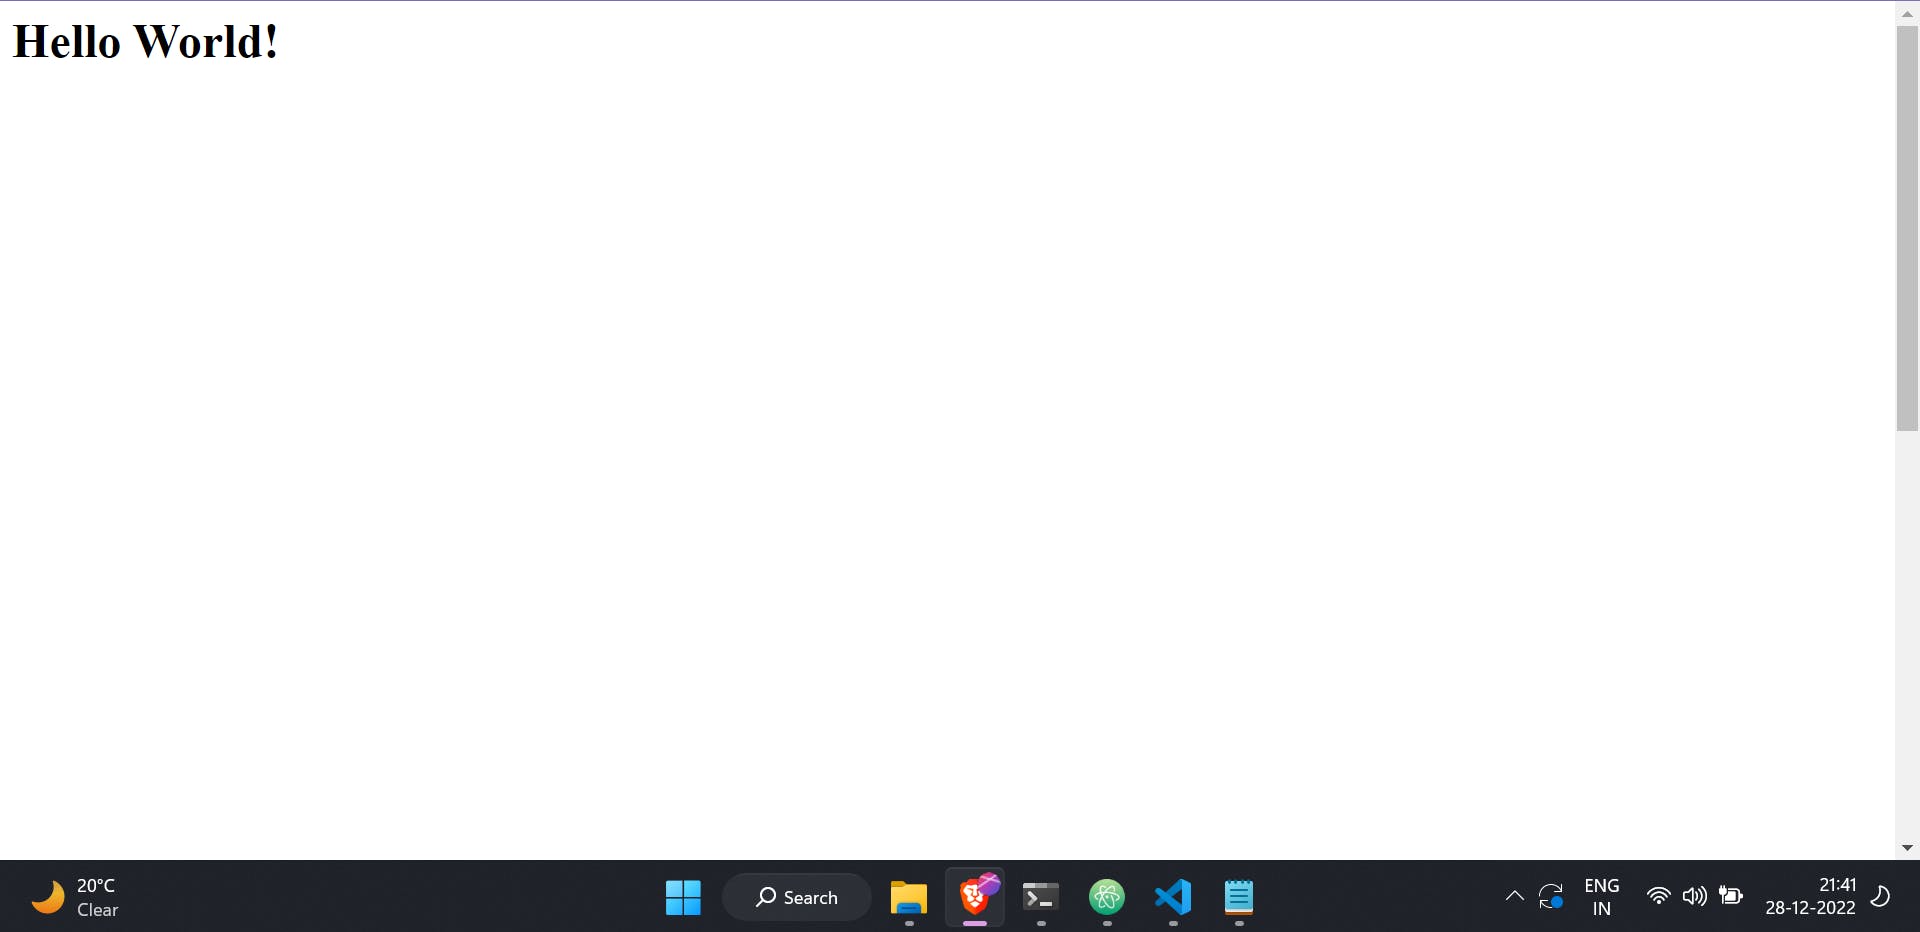
The home.html file is stored in the same directory as the views.py file:
<h1>Hello World!</h1>
Now, let's run the following command on the terminal:
cd new_project
python server.py
To try out Celestis, head over to https://pypi.org/project/celestis/
Conclusion
Finally, we are done with creating our very own backend framework! Of course, several tasks need to be completed before this project can be published and used by Python programmers. So, if you want to see more blogs where I built this project into something big, please like and share this page. It will motivate me to work on the backend framework. With that said, thank you for reading and happy coding!
Image by pressfoto on Freepik